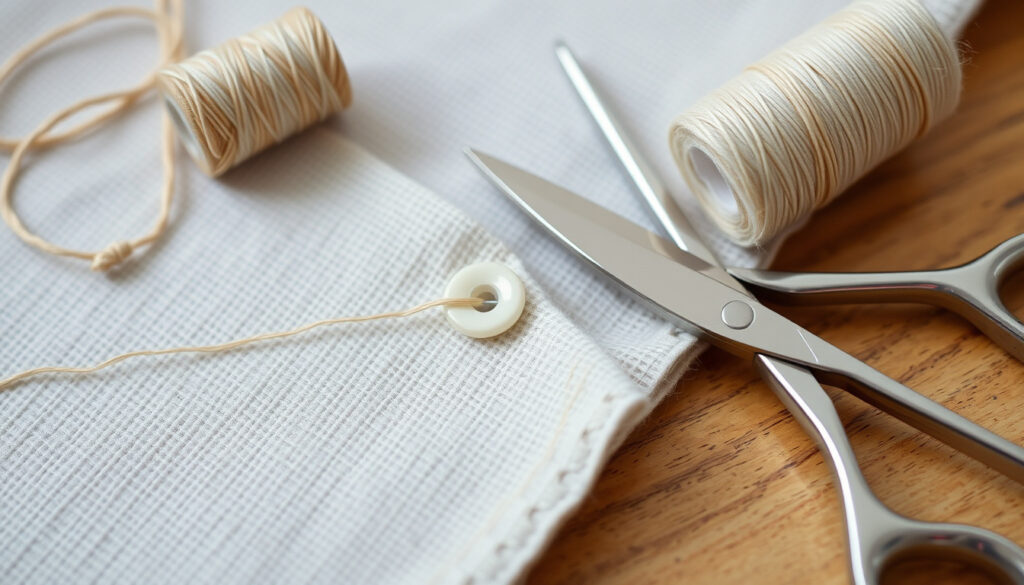
How to Sew a Button: Step-by-Step Tutorial
A loose button can derail an otherwise perfect outfit in seconds – but fixing it takes less time than deciding which shirt to wear. This guide walks through the tailor’s shank method, a simple trick that keeps buttons attached and aligned for years and covers common mistakes and the one technique most beginners skip.
Average button repair time: less than 5 minutes · Common button types: 2‑hole, 4‑hole, shank, and self‑cover · Basic supplies needed: needle, thread, scissors, and the button · Typical thread length: 18 to 24 inches
Quick snapshot
- Using a shank prevents button breakage and improves alignment (UF/IFAS Extension, university life‑skills guide)
- X pattern for 4‑hole buttons is the standard recommendation (UF/IFAS Extension) (UF/IFAS Extension, university life‑skills guide)
- Double thread is stronger than single for button attachment (The Art of Manliness, men’s skills resource)
- Optimal number of thread loops varies by fabric weight and button thickness
- Best all‑around thread material for different garment types is still debated among sewers
- Average time to sew a button: 2–5 minutes (UF/IFAS Extension)
- Most shirts lose 1–3 buttons per year – most failures happen within the first 3 months of wear
- Learn the step‑by‑step shank technique detailed below
- Apply the method to 2‑hole, 4‑hole, and shank buttons with confidence
Six key numbers, one takeaway: most button failures are avoidable with proper technique and a few extra seconds of care.
| Fact | Detail |
|---|---|
| Time to sew a button | 2–5 minutes |
| Thread length recommended | 18–24 inches (double strand) |
| Number of holes (standard buttons) | 2 or 4 (most common) |
| Shank height typical | 0.125–0.25 inches (3–6 mm) |
| Button failure rate per shirt per year | 1–3 buttons lost |
| Most common mistake | Sewing button too tight to fabric |
How to sew a button step by step?
Start with the right setup, then let the needle do the work. The official 4‑H life‑skills guide published by the University of Florida Extension breaks down the process into half a dozen foolproof steps.
-
Gather supplies: needle, thread, scissors, button
- Choose a sharp, medium‑length needle (size 5–9) – small enough to pass through buttonholes easily (UF/IFAS Extension)
- Button or heavy‑duty thread works best; common polyester thread may snap under tension (The Art of Manliness)
- Scissors with sharp points for clean cuts
-
Thread the needle and tie a knot
- Cut 18–24 inches of thread and double it, so both ends meet (UF/IFAS Extension)
- Wrap the thread around your needle twice, then pull tight to create a secure starting knot
-
Position the button on the fabric
- Align the button with its buttonhole. For shirts, the button sits on the left placket (for men) or right (for women) – but the key is matching the original placement.
- Insert the needle from the wrong side of the fabric up through one hole of the button (UF/IFAS Extension)
-
Insert the needle through the button and fabric
- For a 2‑hole button: pass the needle down through the opposite hole and back into the fabric (UF/IFAS Extension)
- For a 4‑hole button: stitch diagonally across to the opposite hole to create an X on top of the button (UF/IFAS Extension)
- Repeat 4–6 times for each pair of holes (The Art of Manliness)
-
Create the shank (space under button)
- Place a toothpick or a needle under the button while stitching to keep a small gap (UF/IFAS Extension)
- After the final stitch, bring the needle up under the button (without passing through a hole) and wrap the thread tightly around the exposed threads 4–6 times (The Art of Manliness)
- The shank height should be about the thickness of the button’s edge – roughly 3–6 mm (UF/IFAS Extension)
-
Secure with a knot and cut excess thread
- Take the needle to the wrong side of the fabric, make a loop knot close to the fabric, and cinch it tight (The Art of Manliness)
- Cut the thread leaving about ¼ inch – no longer, or the knot may work loose
How to sew on a 4 hole button by hand?
Four‑hole buttons are the most common type on shirts, and you have two stitch patterns to choose from. The choice affects both aesthetics and durability.
Why choose an X or parallel pattern
- X pattern (diagonal across holes) is standard and creates a neat look on top (UF/IFAS Extension)
- Parallel pattern (vertical or horizontal lines) reduces fabric stress because stitches run in the same direction as the buttonhole (The Art of Manliness)
Step‑by‑step X stitch
- Bring the needle up through hole 1 (top‑left), cross diagonally down through hole 4 (bottom‑right) (UF/IFAS Extension)
- Next pass from hole 2 to hole 3 (top‑right to bottom‑left) creating the X
- Repeat each pair 4–6 times (The Art of Manliness)
Step‑by‑step parallel stitch
- Stitch through holes 1 and 2 (top row) 4–6 times, then through holes 3 and 4 (bottom row) the same number
- Leave the spacer (toothpick) under the button for both sets of stitches to ensure even shank height (UF/IFAS Extension)
Creating the shank properly
- After all stitches, bring the needle up under the button and wrap thread around the bridge 6 times for a durable stand (Sew It Academy, online sewing tutorial)
- The wrap should be tight enough to hold the shank upright but not so tight that it pulls the button flush to fabric
How to sew a button like a tailor?
The difference between a home fix and a Savile Row finish is all about the shank – and a few tools you already have in your kitchen drawer.
Using a toothpick or match to create shank space
- Tailors place a spacer (often a toothpick, matchstick, or even a spare needle) under the button while stitching to guarantee a uniform gap (UF/IFAS Extension)
- After stitching is complete, the spacer is removed, leaving a clean channel of thread
Wrapping thread around the shank after stitching
- The hallmark of a tailor’s finish: after the last stitch, bring the needle to the top of the fabric, under the button, and wrap the thread around the exposed threads 4–6 times (The Art of Manliness)
- Permanent Style, a tailoring blog, notes that Savile Row tailors leave about ¼ to ¾ inch of excess thread under the button before wrapping (Permanent Style, tailoring expertise blog)
Choosing the right thread weight and needle size
- Thinner thread (e.g., 50‑weight) requires more stitches for strength; thicker thread (30‑weight) needs fewer (Permanent Style)
- For heavy coats, use a sharp needle size 14–16 and reinforced button thread (The Key to Sewing Coat Buttons On, YouTube tutorial)
Final knot hidden under the button
- Tailors finish by knotting on the wrong side of the fabric, not on the button surface, so no thread shows from the top (UF/IFAS Extension)
- The Art of Manliness recommends cinching the knot snugly against the underside with the needle tip (The Art of Manliness)
Which direction to sew buttons?
Orientation matters more than you think – stitch the wrong way and your buttonhole may never close properly.
Aligning button to buttonhole
- Hold the buttoned placket closed and confirm the button slides through the hole without forcing it. The button should sit centered over the buttonhole slit.
- For 2‑hole buttons, the holes should run parallel to the buttonhole slit to minimize stress when buttoning (UF/IFAS Extension)
Stitching direction for 2‑hole vs 4‑hole
- 2‑hole: stitch straight across, parallel to the buttonhole slit. Never use an X pattern with two holes – it will twist the button (UF/IFAS Extension)
- 4‑hole: both X and parallel patterns work, but if the buttonhole slit is vertical, a vertical parallel stitch reduces fabric twisting (The Art of Manliness)
Avoiding twisted thread
- Let the needle dangle every few stitches to allow the thread to untwist naturally (Instructables, DIY community guide)
- Twisted thread can cause the button to sit crooked and the shank to collapse
The catch: misaligned stitching can cause the button to sit crooked, so always align the thread direction with the buttonhole slit.
What are common button sewing mistakes?
Even experienced sewers make these errors – here’s how to spot and fix them.
Button too tight against fabric
- This is the #1 mistake: sewing the button flush to the fabric prevents the button from passing through the buttonhole and strains the threads (UF/IFAS Extension)
- Fix: always leave a shank gap equal to the thickness of the button edge, at minimum
Using weak thread
- Common polyester all‑purpose thread snaps under the tension of regular buttoning (The Art of Manliness)
- Use buttonhole twist thread or waxed cotton thread for durability – waxed thread also resists fraying (Permanent Style)
Wrong stitch pattern for button type
- Never use an X pattern on a 2‑hole button – it will tilt the button and create uneven wear (UF/IFAS Extension)
- For shank buttons (with a pre‑made loop at the back), stitch only through the shank, not through the button top (Instructables)
Cutting thread too short
- Always leave at least 6 inches of thread for the final knot and wrap – cutting it close makes knotting difficult and weakens the finish (The Art of Manliness)
A strong shank takes an extra 45 seconds. Skipping it saves time now but guarantees you’ll be sewing the same button again within a few months.
The implication: each mistake is avoidable with proper technique, and the shank method eliminates the worst offenders.
“The shank is the most overlooked part of button sewing. Without it, the button sits directly on the fabric, and every time you button it, you’re essentially pulling the threads against the sharp edge of the buttonhole.”
— UF/IFAS Extension, life‑skills master instructor (paraphrased from 4‑H sewing curriculum)
“Savile Row tailors measure shank height by the thickness of the button itself. They don’t use a ruler – they just know that if the gap is too small, the button will pop.”
— Permanent Style, tailoring industry blog
For anyone who wants their buttons to last longer than a single wash cycle, the shank technique is the difference between a quick fix and a permanent repair. The extra 60 seconds of wrapping thread around the bridge will keep that button aligned and tight through hundreds of openings and closings. For the average home sewer, the choice is clear: learn the shank, or keep re‑sewing the same button.
For a more comprehensive approach, including tips for different button types, see this detailed guide on sewing buttons.
Frequently asked questions
Can I sew a button without a thimble?
Yes, especially if you use a sharp, medium‑size needle and push it through fabric one layer at a time. A thimble helps for thick fabrics like denim or coats, but it’s not required for shirt buttons.
How many times should I loop the thread through the button?
4 to 6 times per pair of holes is standard. Thicker thread needs fewer passes; thinner thread may need 6 to 8. Always count loops for even tension.
What type of thread is best for sewing buttons?
Buttonhole twist thread (waxed) offers the best durability. For most shirts, a heavy‑duty polyester or cotton‑wrapped thread also works well. Avoid basic all‑purpose thread.
How do I sew a button on a thick coat?
Use a longer, sharper needle (size 14 or 16) and a thimble. Leave a larger shank – about ¼ inch – to accommodate the coat’s thickness. Wrap the thread 6 times around the shank for extra security.
Should I sew buttons with the shirt buttoned or unbuttoned?
Unbuttoned. Sew the button while the shirt is flat so you can align it perfectly with the buttonhole. Buttoning after sewing tests the fit.
What is the easiest way to sew a button for a child?
Use a short, double‑strand thread and a large shank to make buttoning easier. Choose a button with a large shank loop or sew a flat button with a generous gap (¼ inch).
How do I repair a button that keeps falling off?
The button is likely too tight. Remove it, re‑attach with a proper shank (use a toothpick spacer), and wrap the thread 6 times under the button. If the fabric is frayed, reinforce the area with a small patch of interfacing before re‑sewing.
More related posts
 Mad Max: The Wasteland: Release Date, Status and News
 Call Her Daddy Podcast: Host, Controversy & Why It’s So Popular
 What Is a Hedge Fund – Definition, Strategies, Fees and Risks
 How Much Benadryl Can I Give My Dog? (Dosage Chart)
 How to Hard Boil Eggs: Perfect Timing and Easy Peeling Tips
 Chamberlain Garage Door Opener – Programming and Troubleshooting Guide
 Portland Trail Blazers vs Dallas Mavericks Match Player Stats
 Non Toxic Air Fryer: 2026 Guide to PFAS-Free Materials